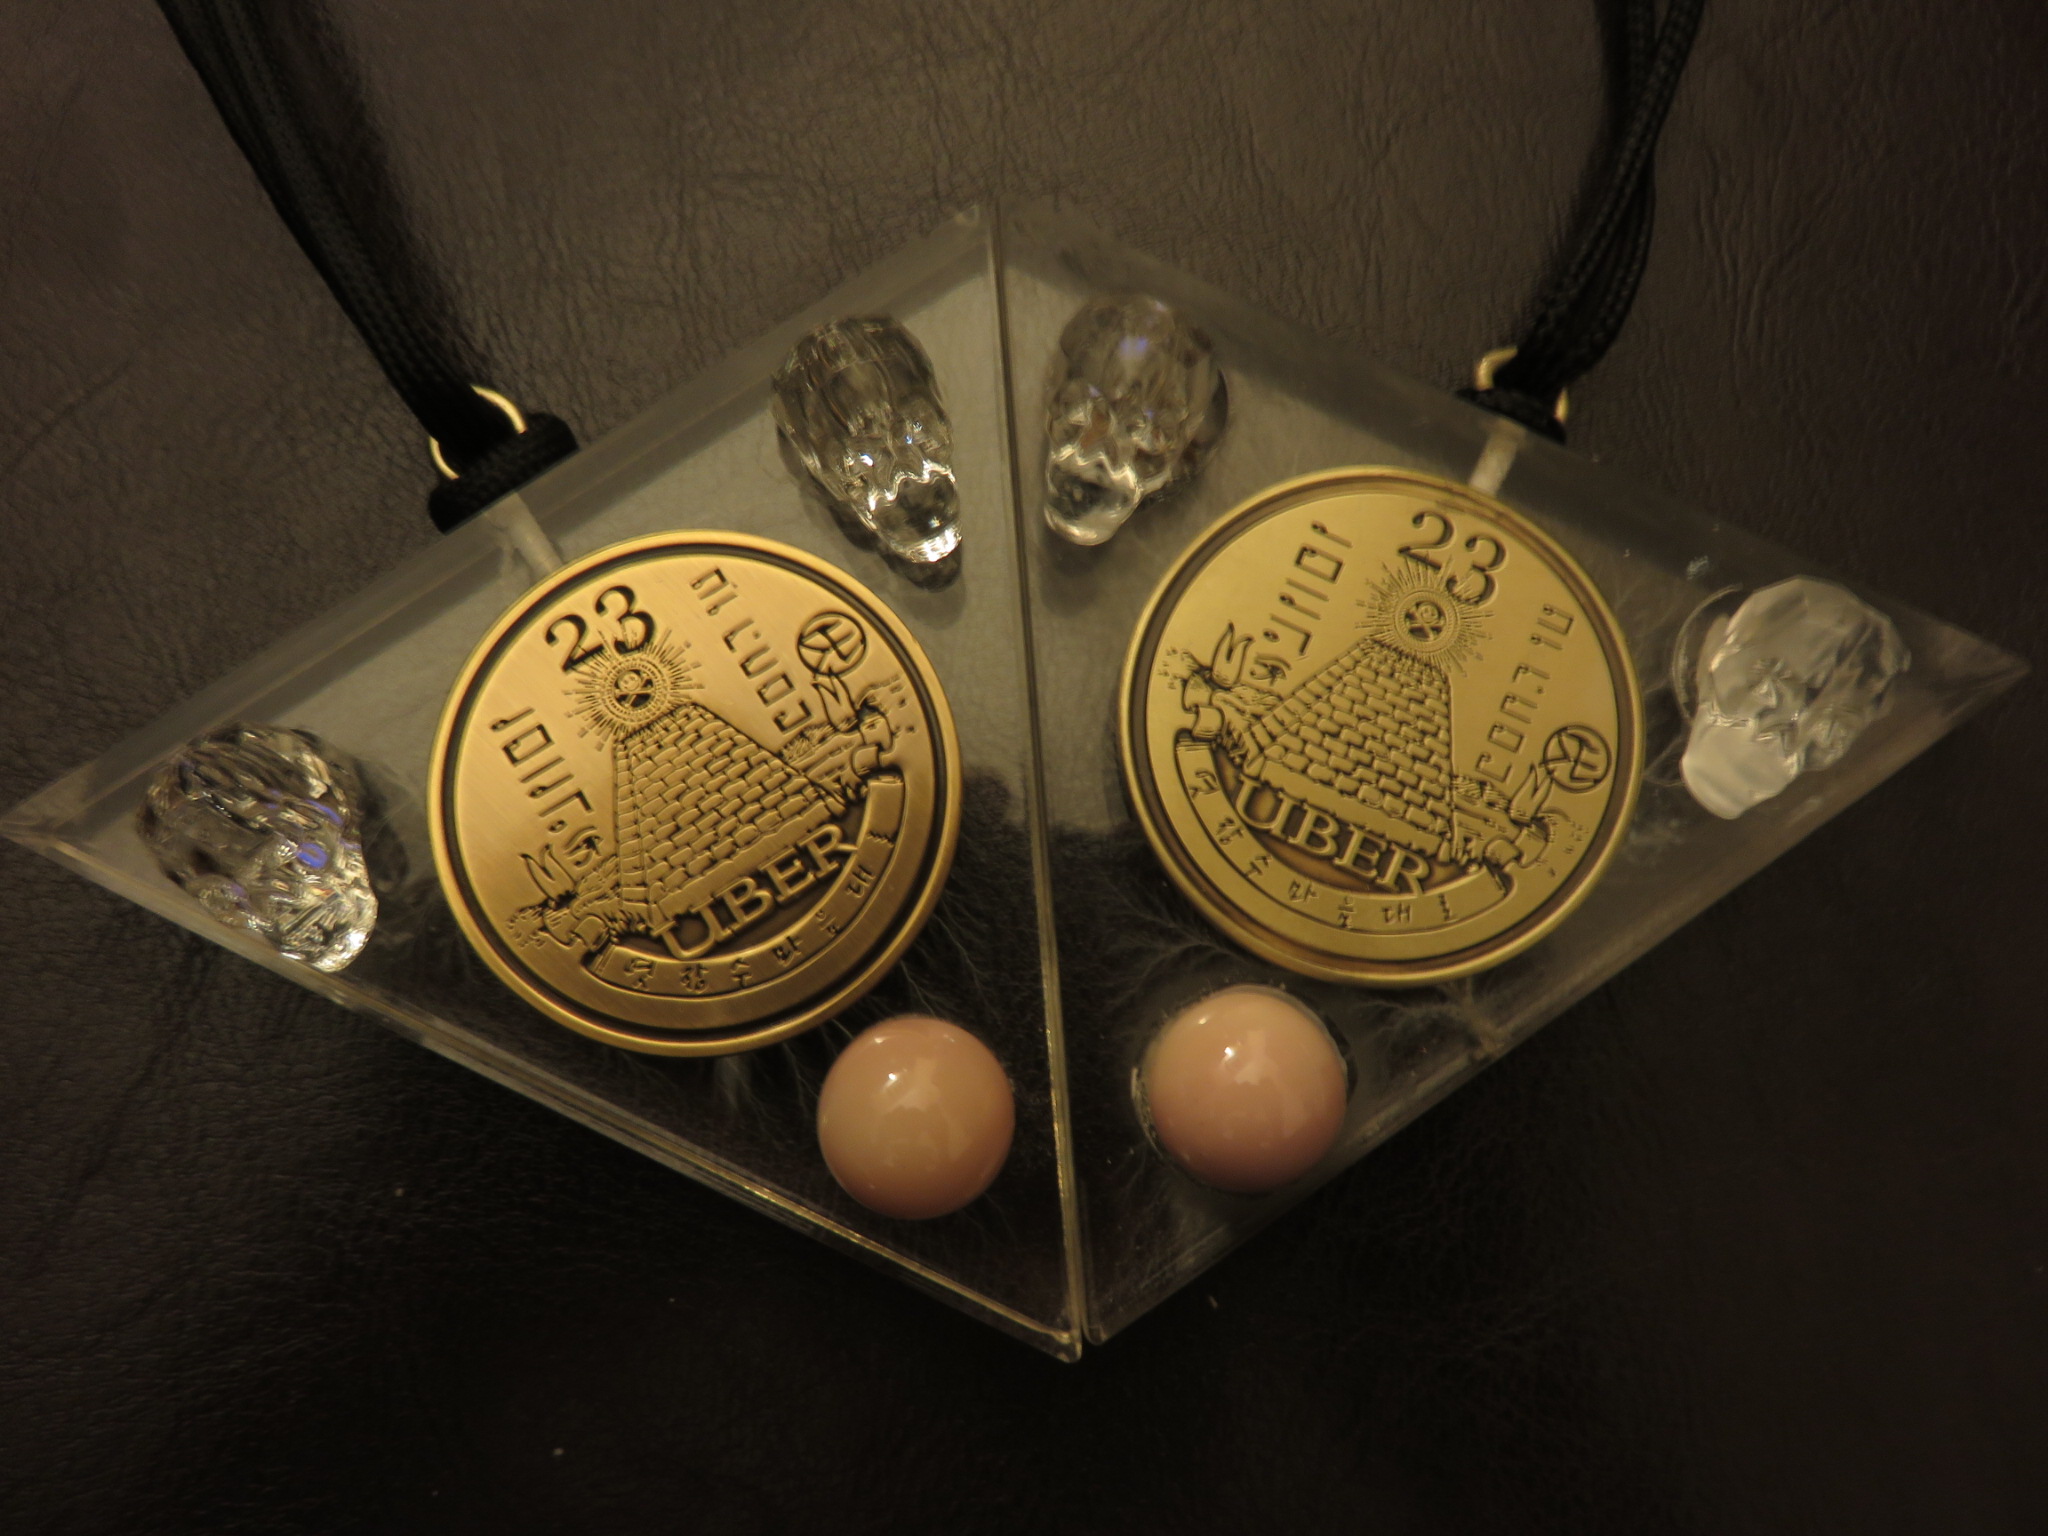
DEFCON 23 UBER Badge Replica
write-up by junkmail(co9). replica by wumpus(co9) and junkmail(co9)
Four years ago I met a group of randoms at DEFCON 21. I had heard that the Badge had a competition and started puzzling it out. My small group grew larger as people saw what we were doing. 72 intense hours later, we finished - Second place - not bad for n00bs. Defeated but resolute we formed the Council of Nine with intent to compete again - and win. After our second defeat we repeated the resolution and Lo! DC23 was our first victory.
There is always interesting math of how many badges are awarded for any particular Defcon contest - Most have a single Uber badge granted and others receive one per team member. At DC23 we received a single Uber for winning the Badge Challenge. The DC23 badge is an awesome tribute to Richard Feynman and includes captured lightning, several radioactive isotopes and a kickass crypto coin with brilliant artwork. Immediately discussions began - can we counterfeit this Work of Art?
Yes. Yes we can.
We had one official badge awarded for winning DC23. The DC staff forces that badge to be assigned to a self-dox’d individual (as in Give us your Name, alias, and signature in a little black book or you get nada! Boo!) After all that, our designated owner was (quite reasonably) reluctant to physically ship it about. Instead he took a bunch of measurements and photos, and I worked from them.
Our total project time spanned over about 6 months, most of which consisted of research and awaiting order fulfillment. But we feel the results were -up on his making of the Uber, complete with its rich history and tribute to physicist Richard Feynman. As descriptive material, he noted the many radioactive components, the sculptural Lichtenberg figures and the crypto coin.
Lightning the Load
One of our team (let’s call him wumpus) researched the Lichtenberg and found one single source! Easy right? Not so much. The creator alluded he was retiring and would no longer be producing these amazing figures. As we didn’t have a 5 million volt, 150 kW particle accelerator readily at our disposal, we figured we were out of luck… or were we?
wumpus contacted the creator and brilliantly convinced him to come out of retirement one last time to make our sculptures!* He provided the specifications and quantity, and we were set for November delivery.
The limiting item was the Lichtenberg figure, without which there would be no replica. And with the Lichtenberg figures on order for a November creation, we moved our attention to the more attainable items.
Go ‘Topes!
Armed with a list of specific materials our other builder junkmail (hey thats me!) started to dig. I found research sites that allowed for scientific samples of radioactive material to be sold in the US. These sites united our efforts to obtain nuclear samples of:
- Trinitite Fragments
- 3% Uranium Marbles
- Europium powder
- Uranium Ore
- Torbernite
- Uraninite
- Pitchblende
- Carnotite
- Gummite
- YellowCake
- Tritium Vials
Europium powder is cool. It glows like nothing else - really brightly - especially when you hit it with Ultraviolet light to charge it.
The remaining components are rocks, dust and sand. These ores and samples are placed under each of the two skulls as indicated.
We’re not going to go into detail on where these materials could be purchased exactly, but with a united effort and research university credentials, you might locate the nuclear materials. Or not.
Uranium Glass was actually pretty common until the 1940s. It was used for a long time in glassware until people started watching Godzilla movies. Nah - it was WWII and availability of U that reduced its use on plates used for food). I ordered the Uranium marble from our supplier. I admit I did panic a bit on opening the package: Clear marbles were shipped! They were the correct size, but not matching the need. After a few emails, and my insistence that the supplier’s website image still showed the 5/8" pink variety, he dug through his old stock supply and made the exchange.
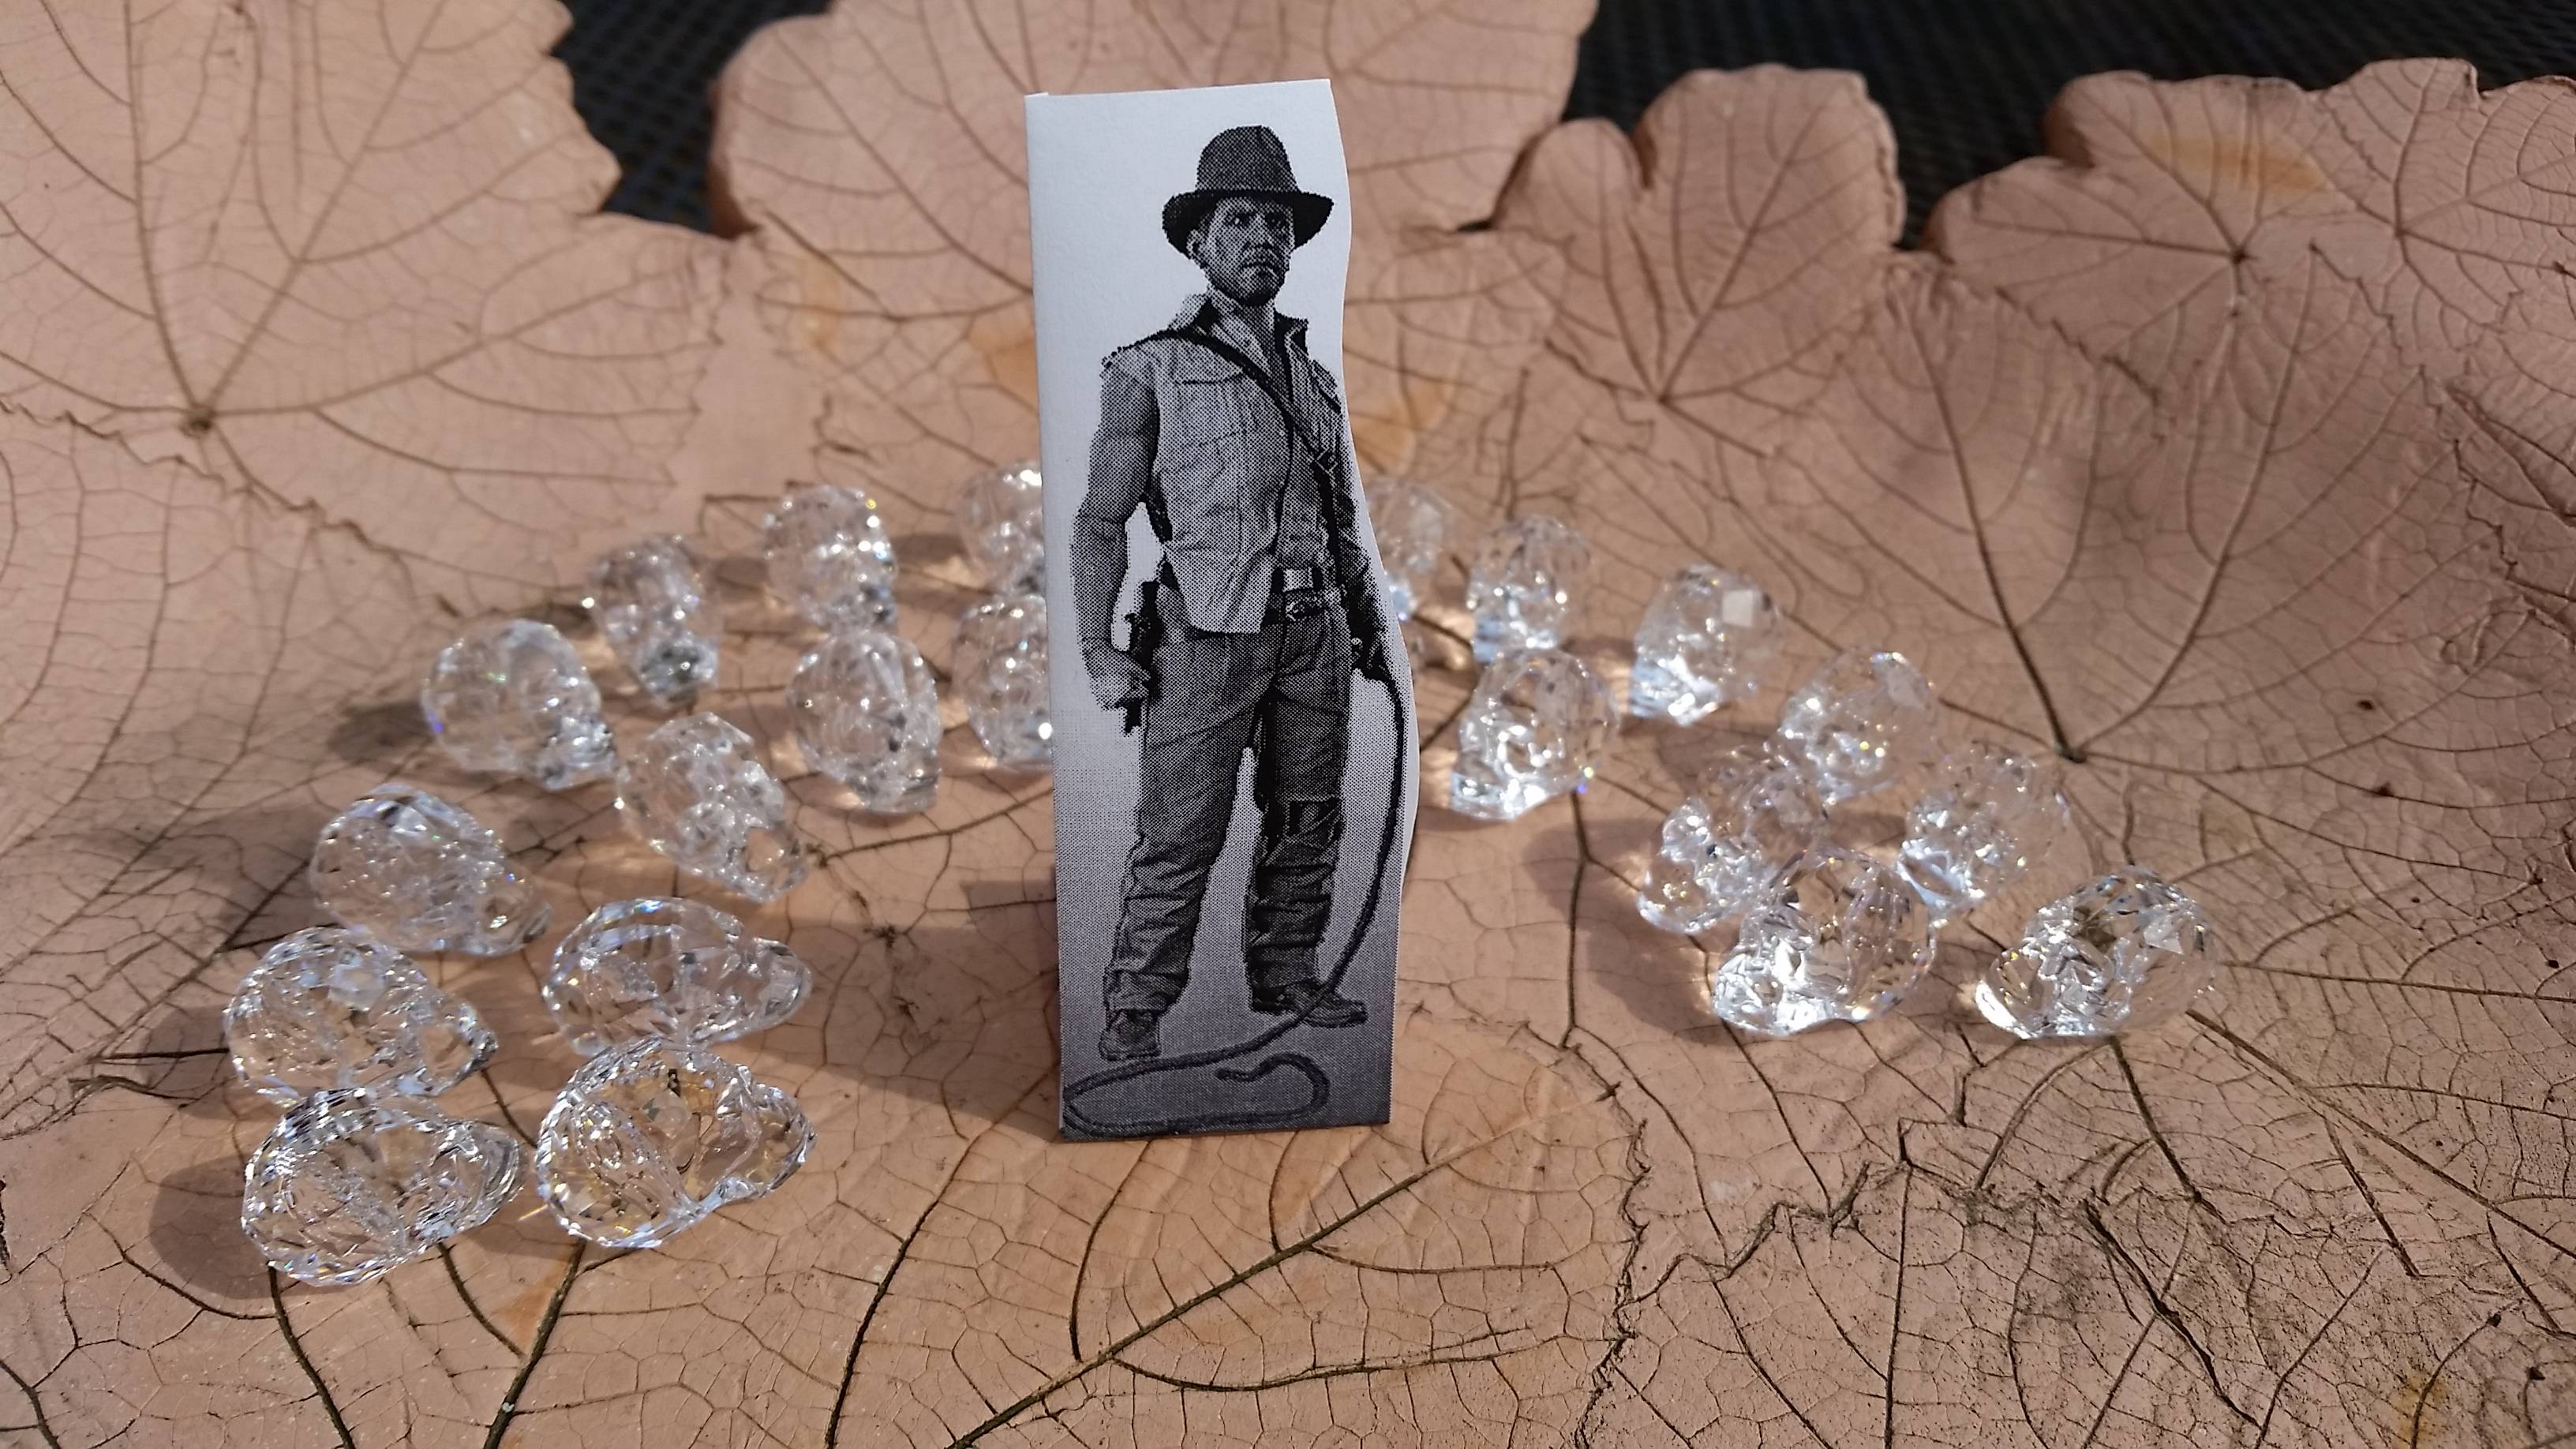
The Skulls were found with google fu, notably appending “-Indiana” to every search. In the end we determined that Swarovski (oooh fancy!) crystal skulls were exact matches. There remained a question to their patina - some online images of the Uber showed a prismatic effect, while others showed clear. It appears that different skull hues were used among the final badges. The prismatic effect in sample skull I got seemed to be far too strong compared to the comparison images, so after some debate we opted for clear skulls on both left and right sides.
Inside the left skull is a Tritium Vial. This vial is the type used for watches, gun sights and exit signs to glow for years of its own nuclear decay. It was pretty straightforward locating the T1-sized vials. T1 vials fit into the left skull bore. The vials were selected to match the color (light blue) and sized to fit in to the Crystal Skull. Did I mention the skulls are actually jewelry beads? So there was already a small hole available for the vial.
A Challenging Coin
And finally the most time consuming part - the Challenge Coin. I had never duplicated (or made) a challenge coin before, so I had no reference how long or how much effort this would entail. Originally I had considered a laser etched version and a 3D printed but after some tests realized that the laser etching a black at depth would be time consuming if even possible, and using my 3D printer just couldn’t provide the resolution, especially in the finer Korean characters and intricacies in the central pyramid.
I started the duplication with the artwork. Having little experience and an Adobe creative cloud account, I learned to use Illustrator. Now Illustrator has an auto-trace function available and despite my modern and surprisingly affordable sculpture being crushed on the Hydraulic Press Channel (yes other Co9 members - I just plugged myself), I am no fine artist. So autotrace sounded perfect right?! I loaded one of our better images, sat back and waited for the file to be ready for the vendor…. So yeah - it’s not that easy. The auto object was about a billion polygons, and far too heavy to open, let alone edit down for use. In the end I took another approach and searched for clip art.
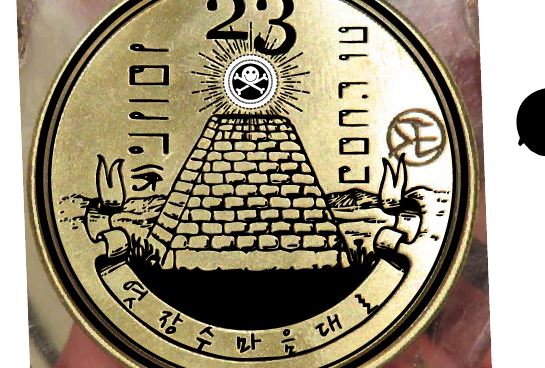
The main Pyramid is quite similar to the Illuminati all-seeing eye on a dollar bill and there are many many renditions online. Fortunately Adobe provided the material needed. The Korean characters, UBER block letters front crypto text and some clip art edits were all hand drawn, removed or traced manually to match the images. Remember kids - if you are copying a coin, make sure the original picture is proportionally correct! It took a little while to realize that the coin in my image should be circular… (First you do, then you do over!) The artwork took a long time primarily due to my inexperience with illustrator.
The reverse side (coins have obverses and reverses, not fronts and backs, though heads and tails will do…) was more challenging. Even with an original in our remote possession, the coin details were not clear through the ½" thick acrylic Lichtenberg. Luckily, 1057 had distributed a few loose coins to friends – a result of having both deserving recipients and minimum quantity coin orders. This image shows a Vulcan Live Long and Prosper hand sign as a posthumous tribute to Leonard Nimoy, a stylish skull, cryptotext (which we had not yet deciphered), and 1o57s signature. I followed a similar route as the obverse and manually recreated all the components as I could not locate any clip art.
Now with the file and Occam’s razor in hand, I used the simplest method for creation: Outsourcing. There are too many challenge coin vendors out there to be sure but I suspect many just send them overseas for production which was the case from our nearly random selection. Showing the purchase agent my design and images of the coin, I had to explain that this was a copy, not the original because, uhh, we had, umm, lost the file. She could not see any difference. Encouraged the order was placed.
There appears to be a minimum line thickness possible with stamping coin. In a few cases I was below that minimum though it is hard to detect unless you are looking.
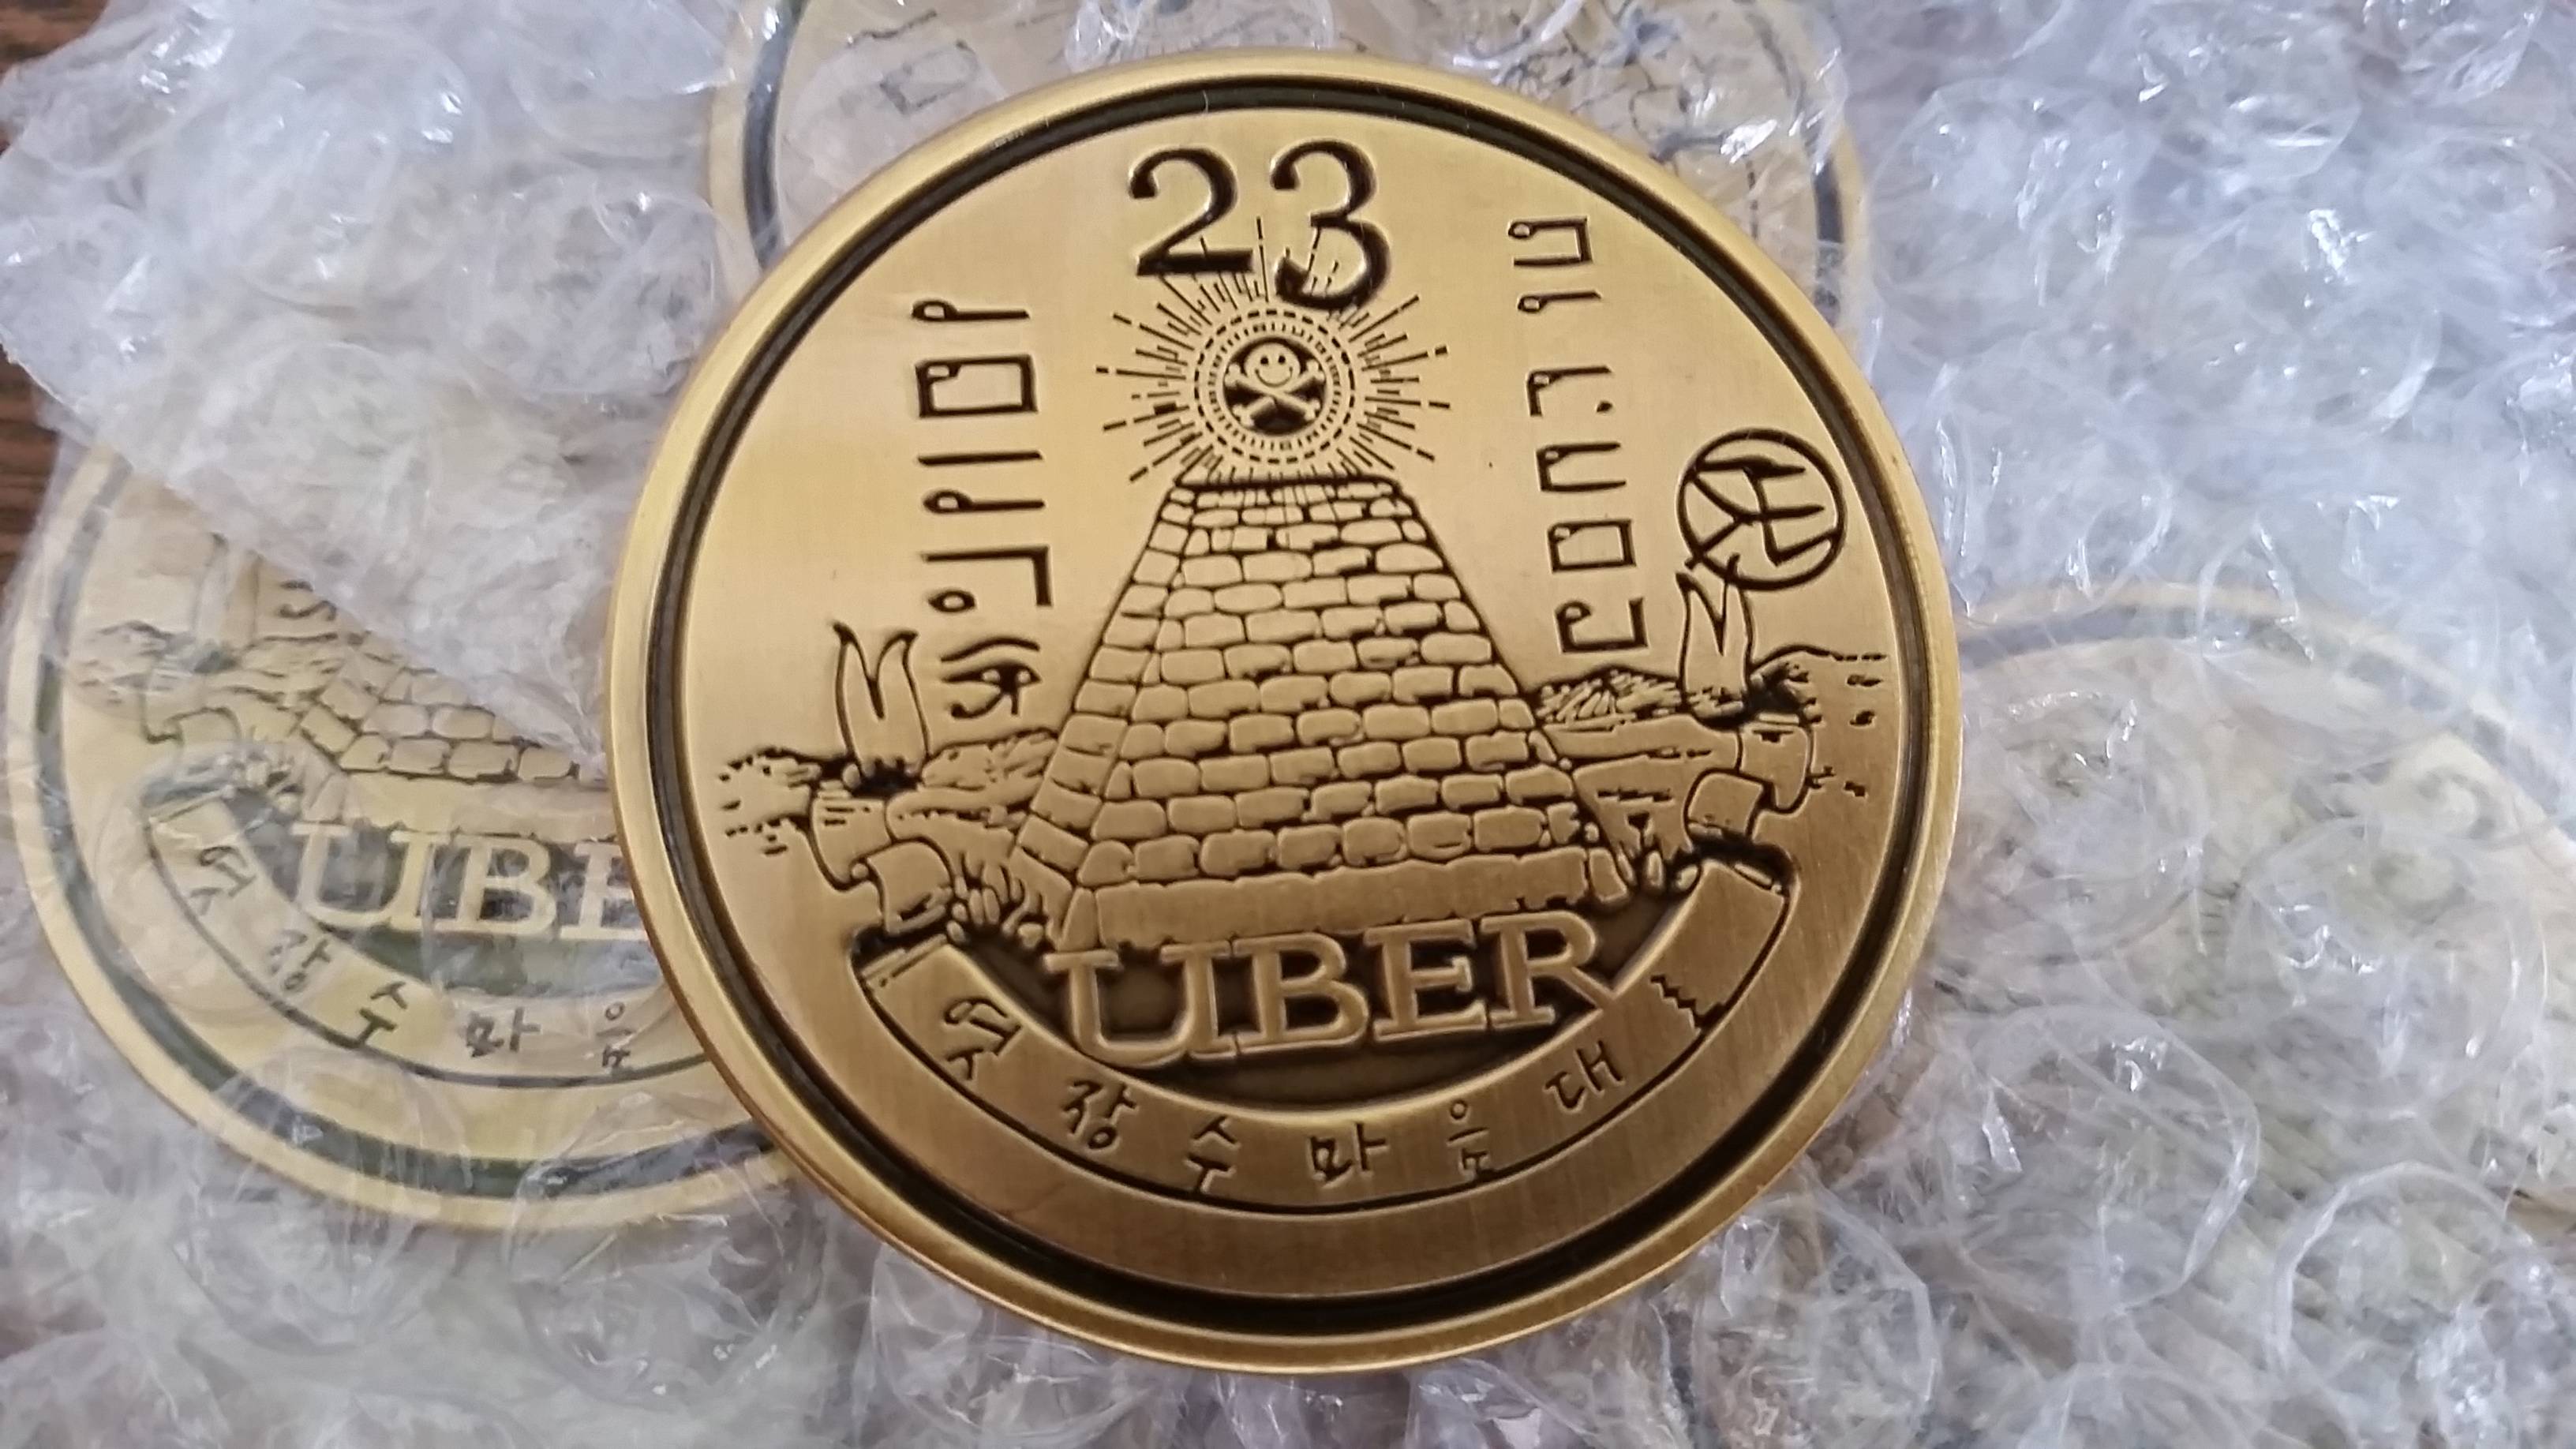
I received the coins a few weeks later and I was stunned. They looked Amazing. I put one on my pocket and it has been there ever since :-)
The Build
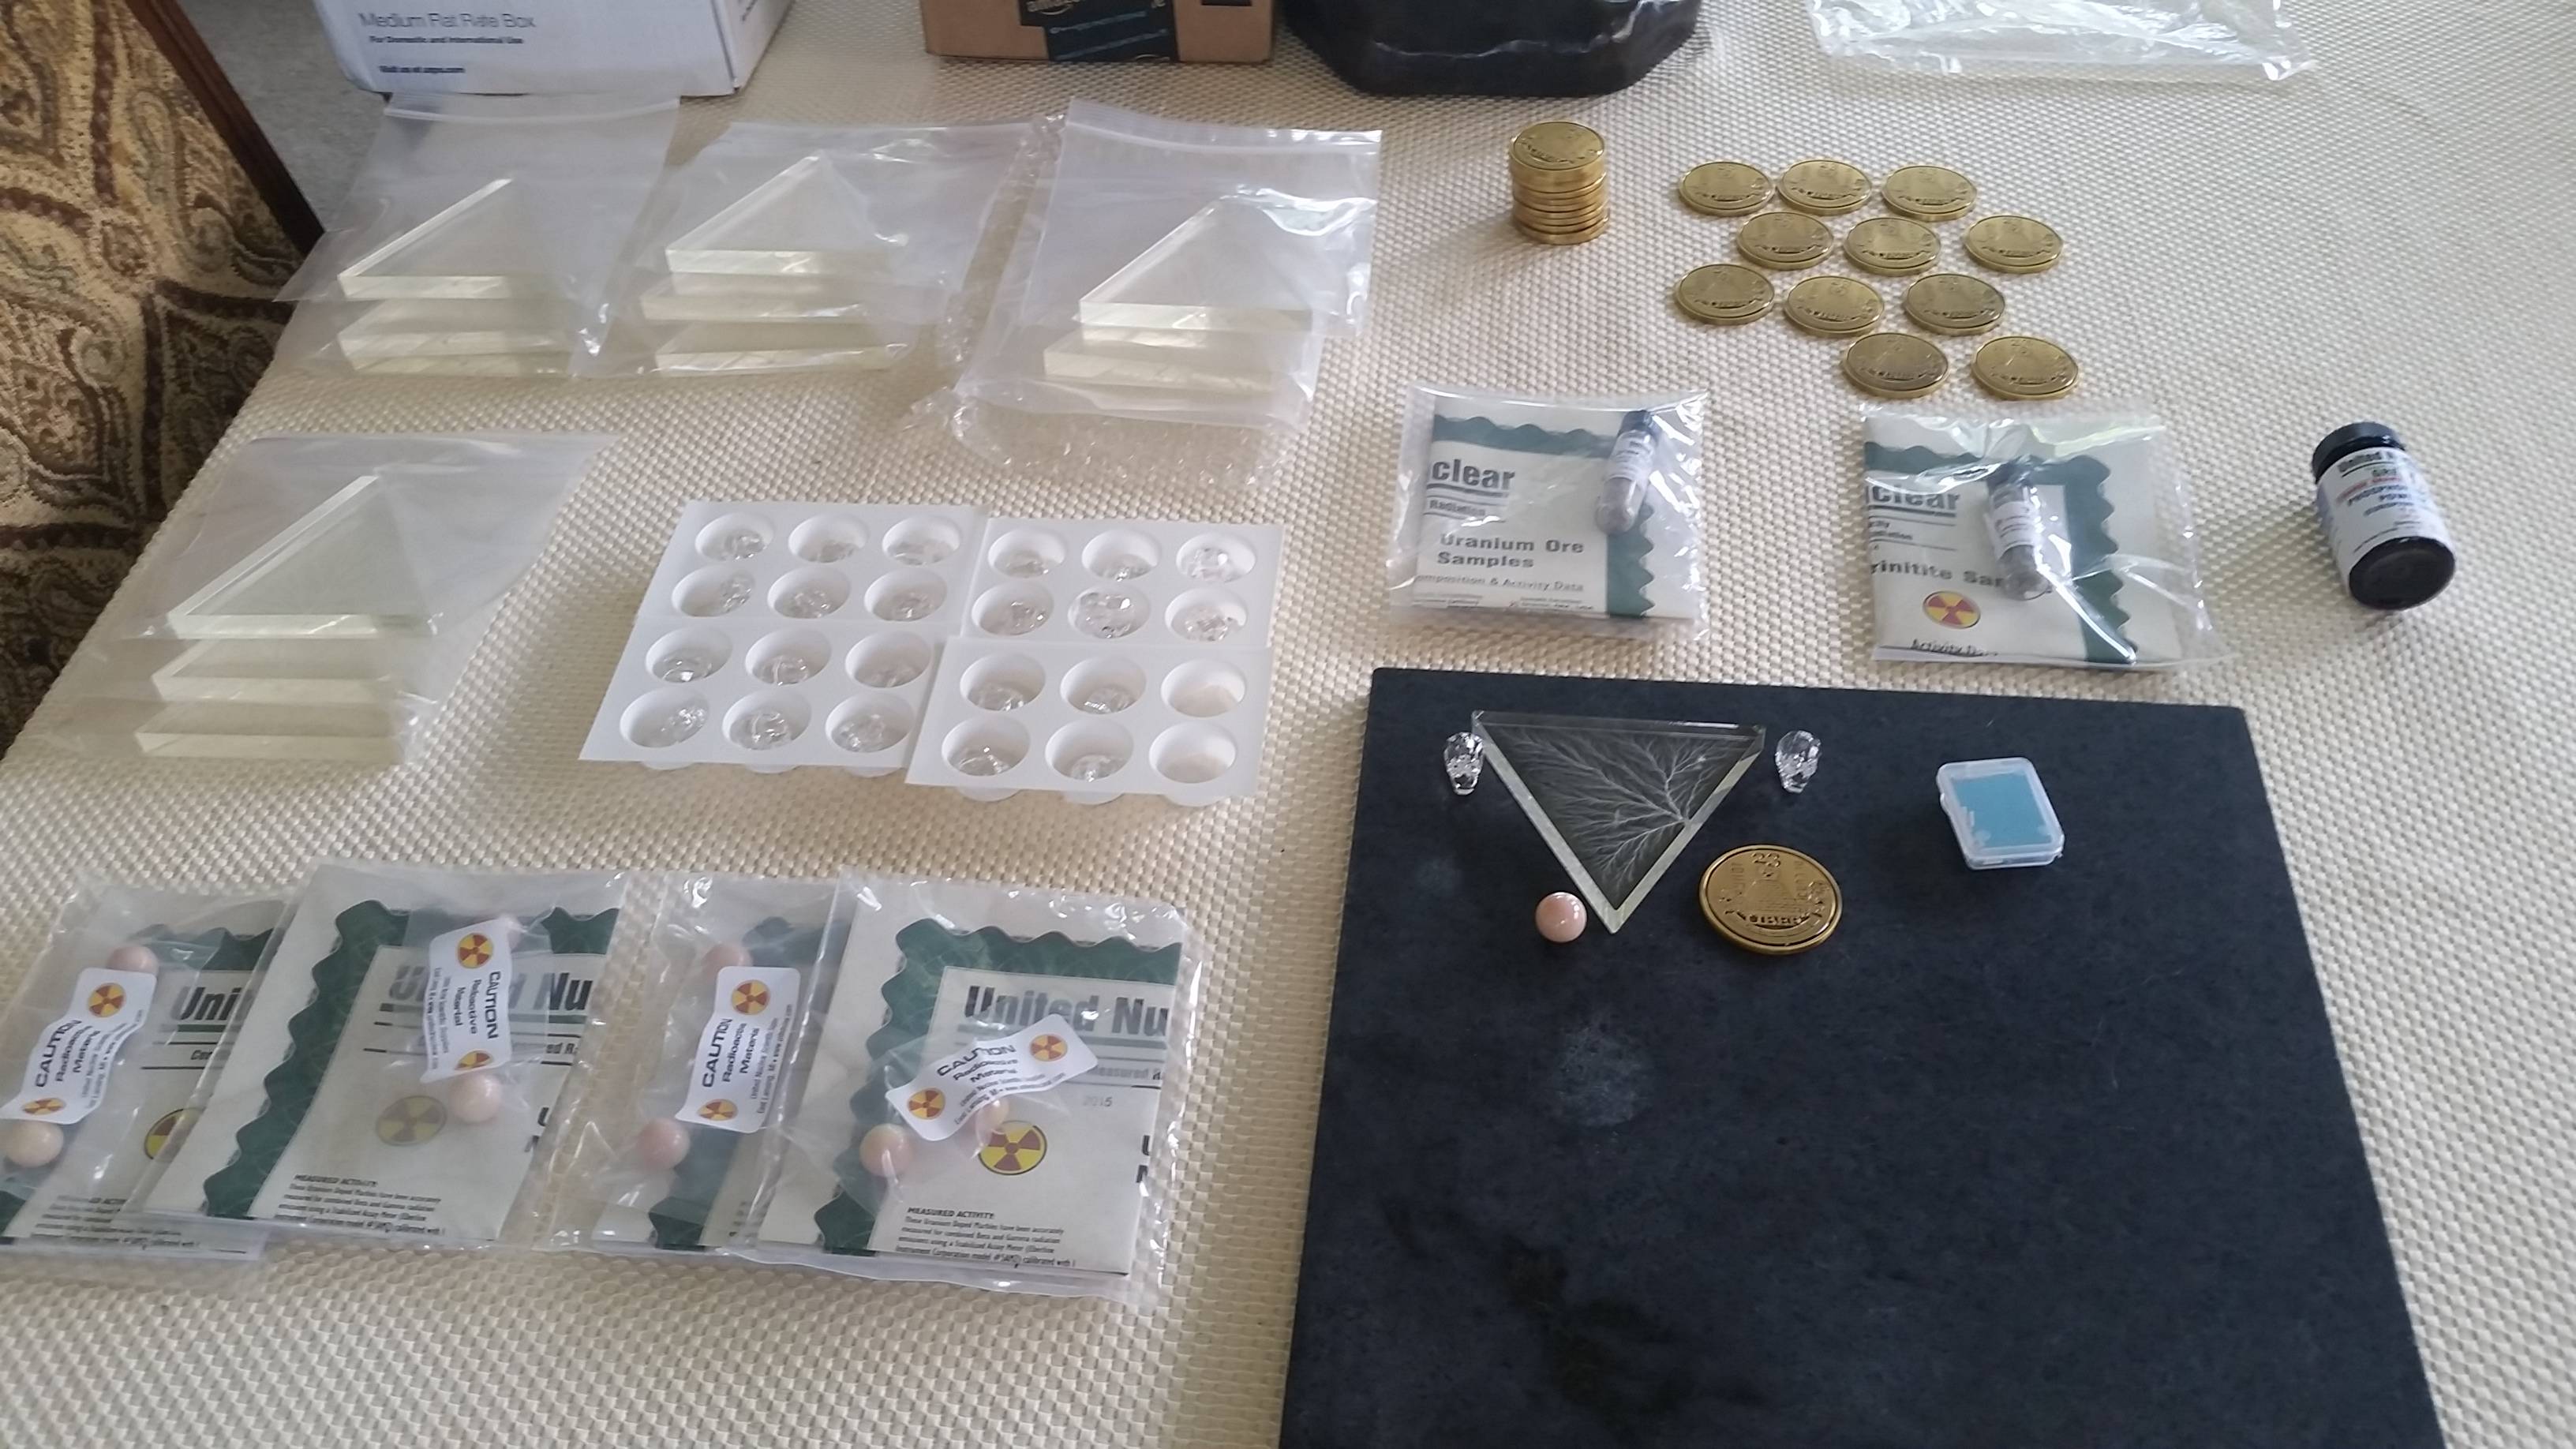
Parts started arriving in early 2016. It was February before everything was in hand but I was still missing something… glue! What adhesive was used? it was not totally clear, but close. At first, cyanoacrylate (superglue) was considered, but this tends to off-gas and leave a whitish vapor residue. Epoxies and other glues were considered but none dried optically clear until I came upon GS Hype jewelry cement. It is made specifically for attaching glass beads to jewelry and stay clear. Importantly it also works well on plastics and glass. And that it could hold diamonds and emeralds to those Fabergé eggs was good enough for me. Amazon for $6.
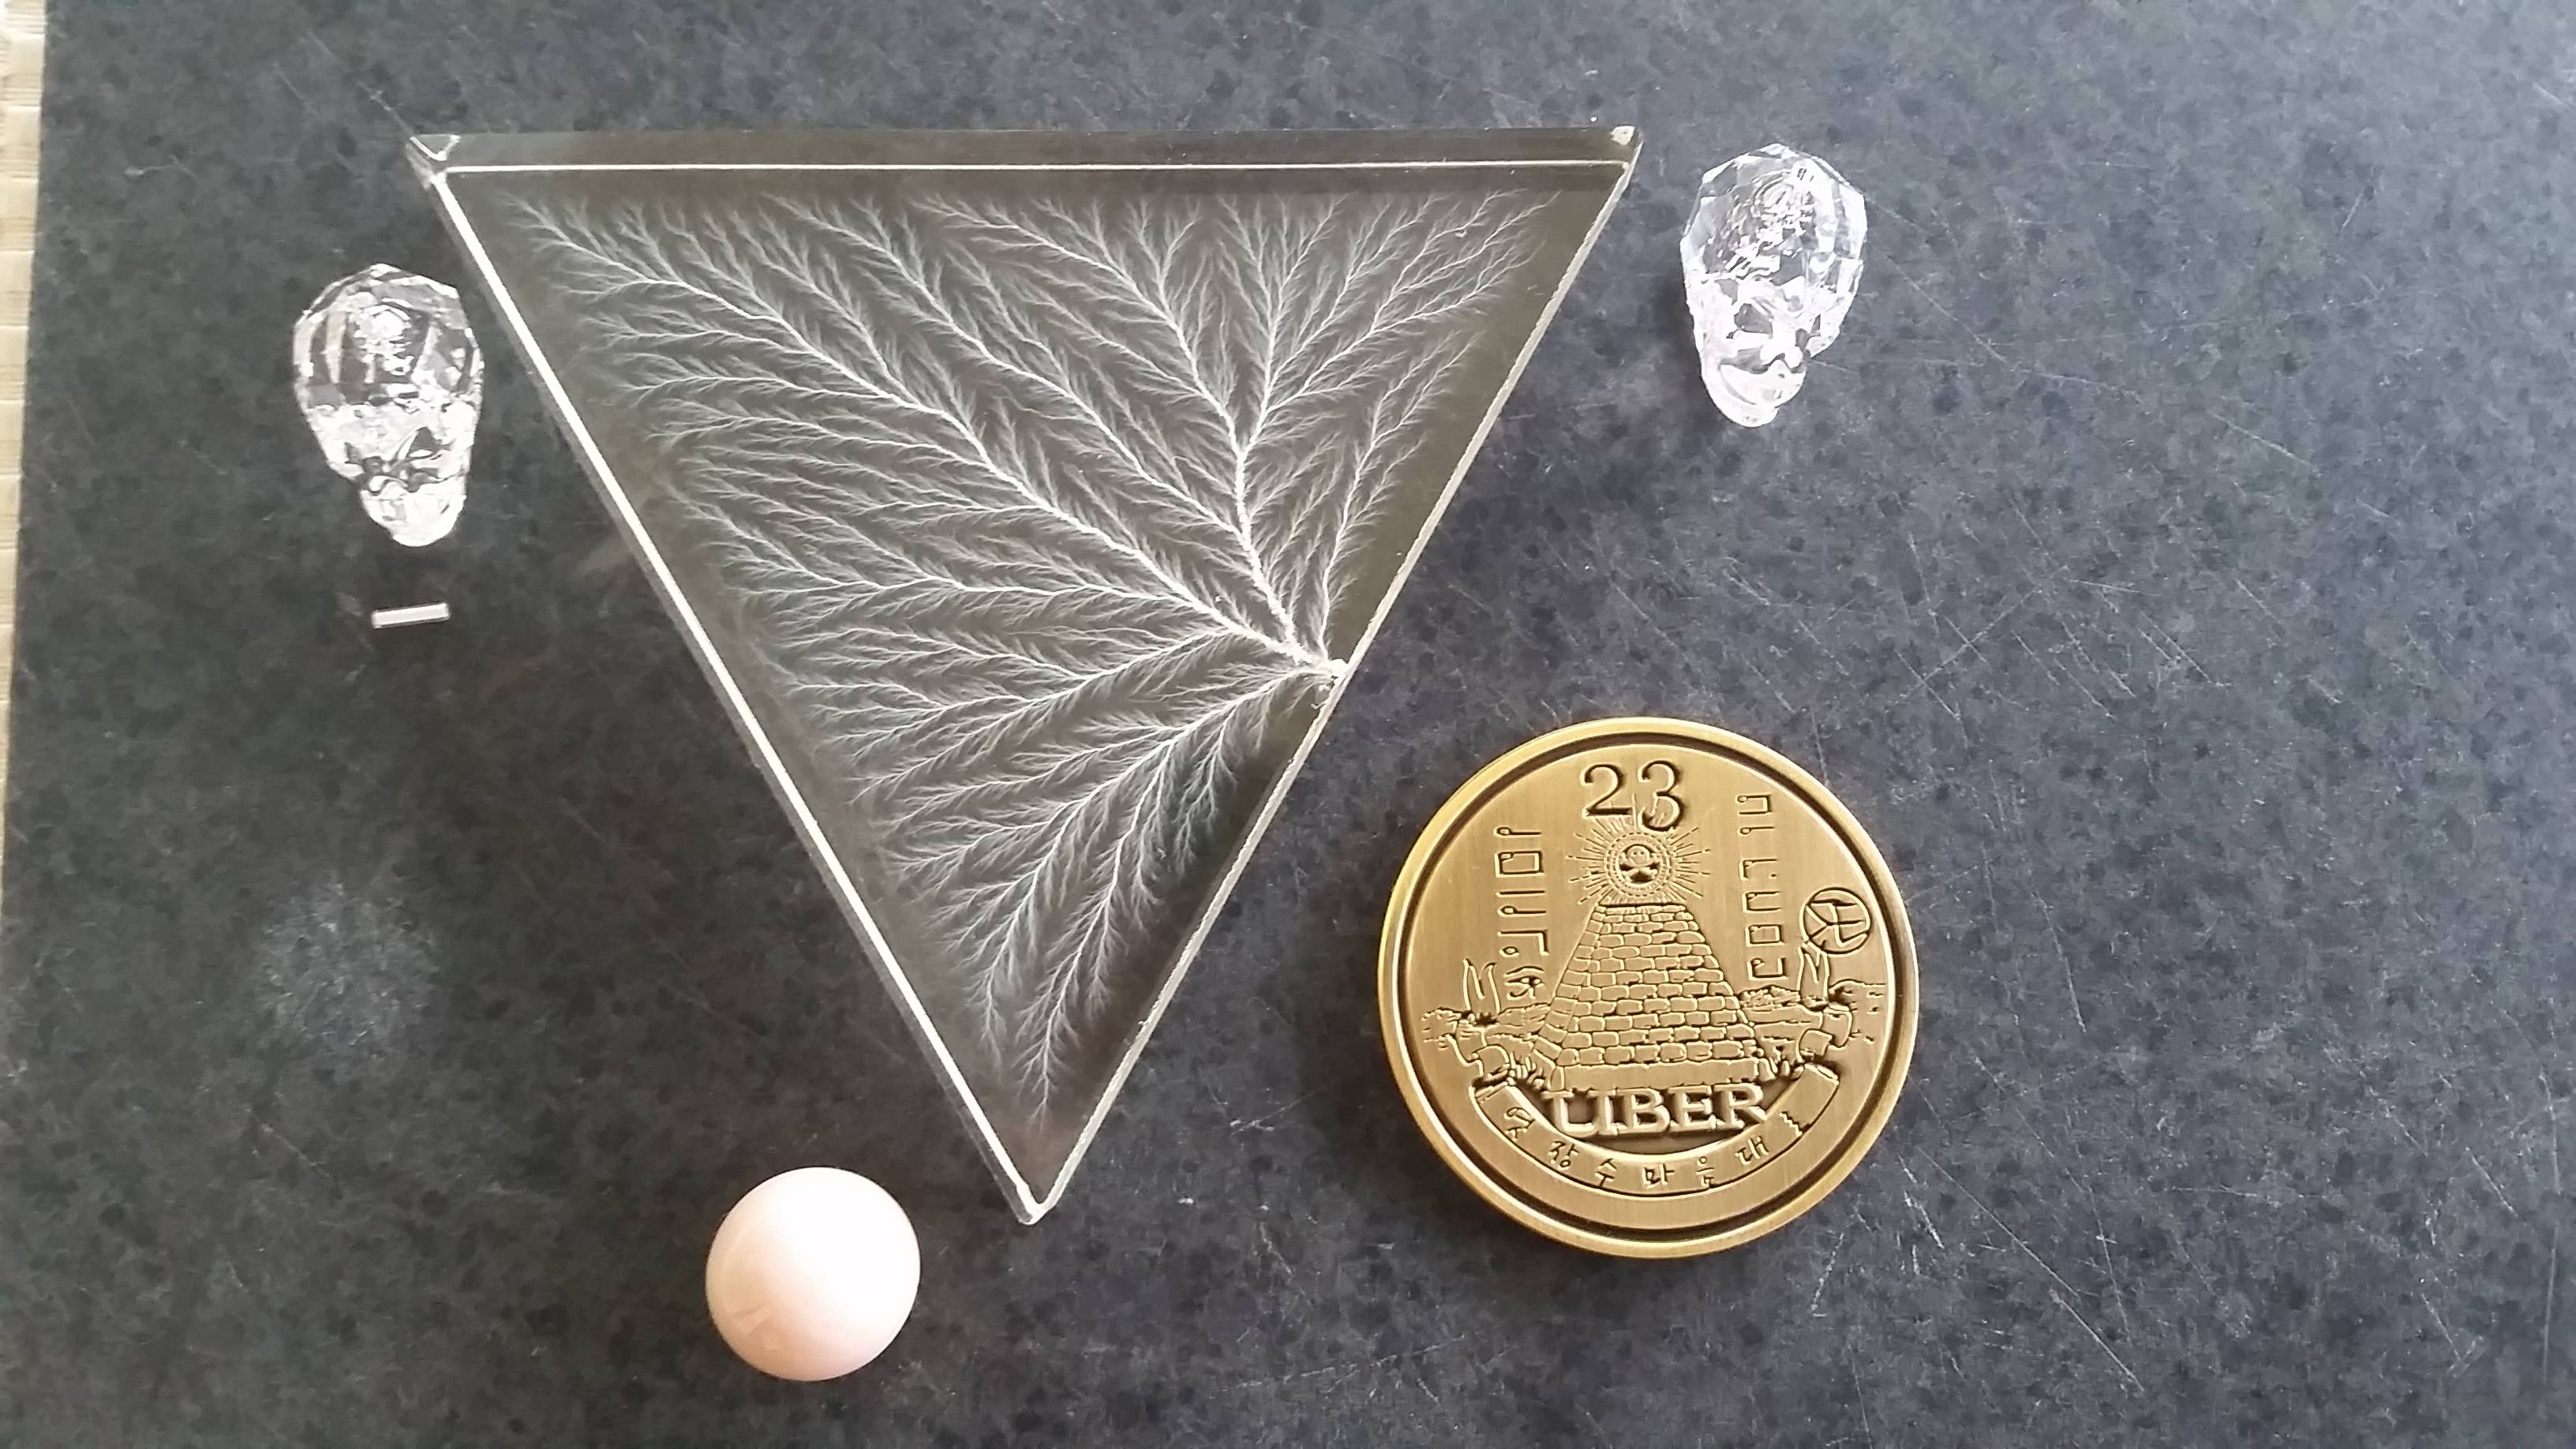
Now the easy parts: Measure and drill some holes (standard ¾" drill bit), apply thin glue, drop in ores, more glue, and a skull on top. Slip in the tritium vial and cap with more glue. Wait until dry. I followed the same procedure for both skulls and the Uranium+Europium marble combo at the bottom. Also, Europium gets into everything. That tablecloth still glows after I turn off the lights.
The final two steps were gluing the Challenge coins centrally, and adding the hook/lanyard, both of which I got at a local HD. Not perfect matches, but pretty close. I had to rework the hooks in to a more 'diamond’ shape and noted the way the original lanyards were tied.
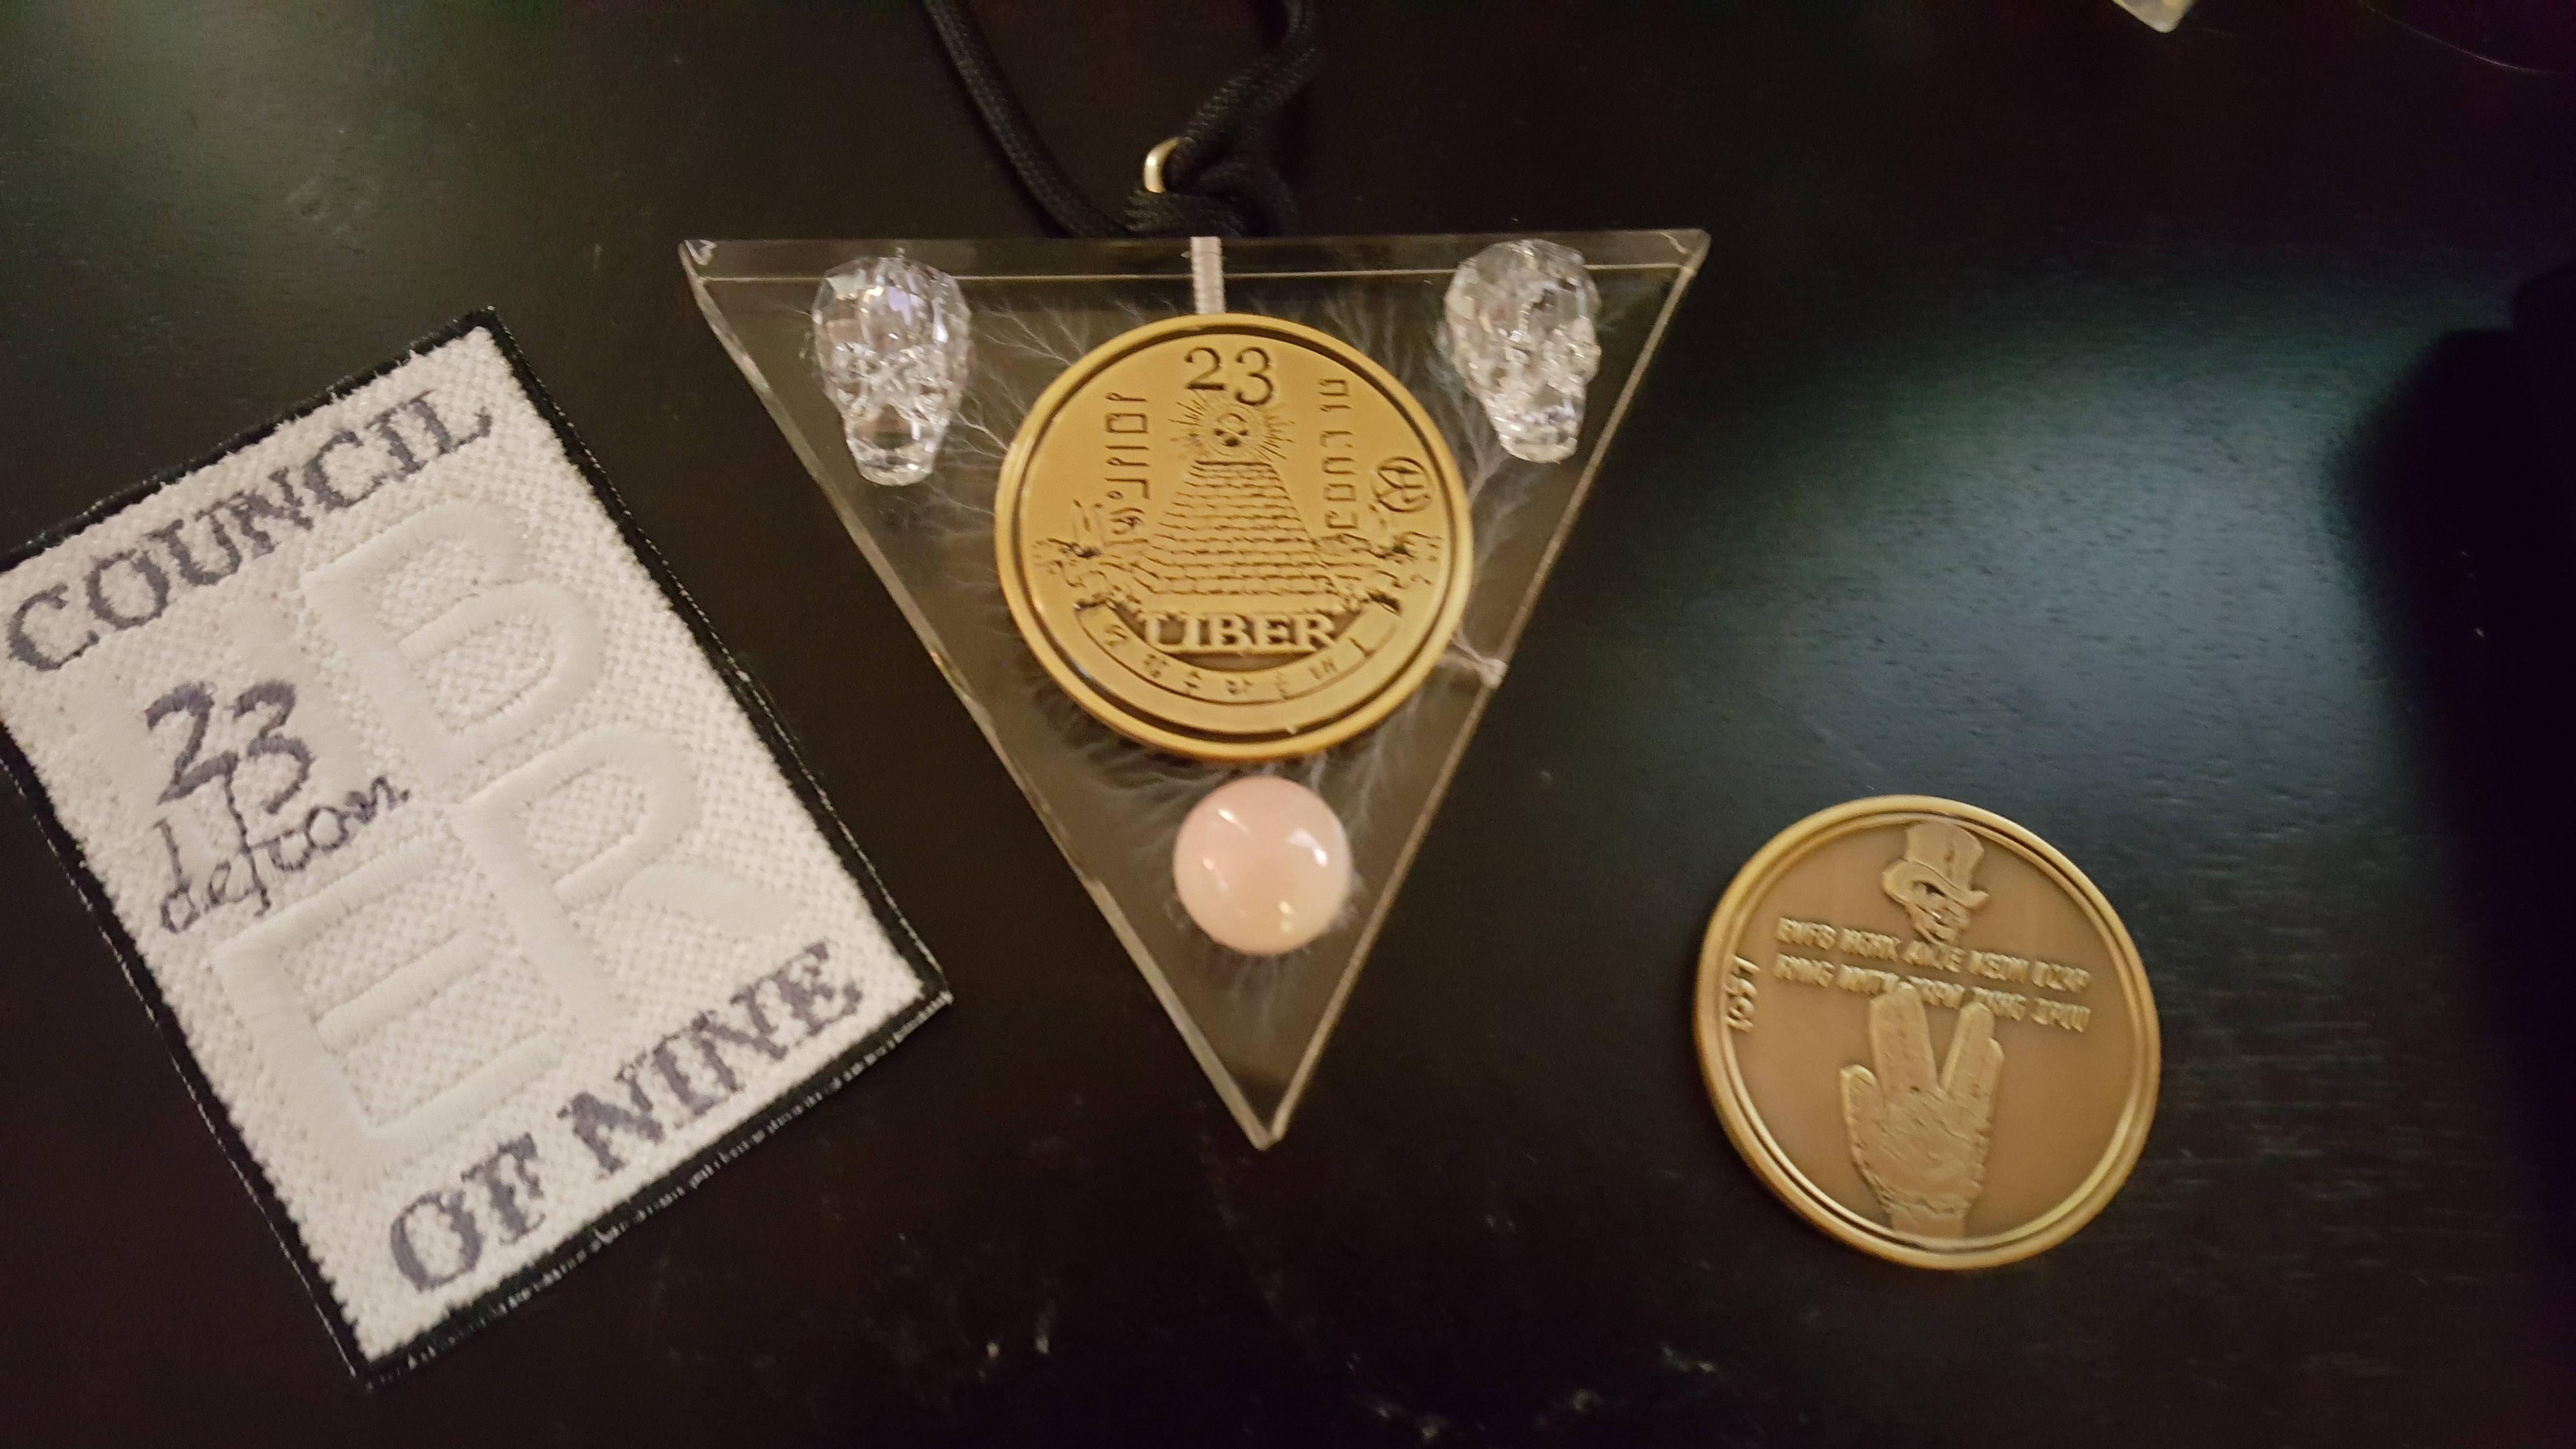
*Denouement: The Joke’s on Us.
Remember that retired guy who we expertly coaxed back into making the Lichtenberg figures for us? At the EFF badge hacking contest at DC24, 1o57 let several things be known:1) The Lichtenberg figure guy really is retiring, but he just has a deal with 1o57 to make us work for his help! (Another counterfeiting team got the exact same story - that he’d 'come out of retirement’ for this project). Even better, he also contacted 1o57 when someone ordered the triangular figure. So 1o57 totally knew what was up. Well played 1o57… Well played.
2) The real Challenge Coins have a secret mark on them! 1o57 added a random looking scratch to the coin to mark it as his own, but it blends in like just another scratch. Good luck locating it without an original! (or with an original…)
Thanks to the rest of Co9 for trusting me with the project. For the time, money, and effort spent on this build, it was fantastic experience with amazing results. I do hope to do it again with our DC24 Terminator UBER!
Presentation to 1o57
Co9 loves the Badge Challenge. We realize the incredible amount of effort the 1o57 volunteers every year to make this happen and are greatly appreciative. We built an extra replica to give to 1o57 to show our appreciation, and gave it to him right before the DC24 opening ceremony. He loved it and wore it on stage. He gave us a shout out too that this was the best counterfeit he’d ever seen. So Happy.If you like to make/build IRL hit me up. [No, I won’t make you one so stop asking!]
–junkmail3 (@) gmail